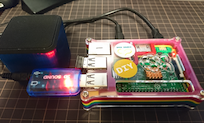
IoT|硬體|Linkit 7697|透過安裝於樹莓派之 OpenHAB,以 MQTT 控制 LED(門鎖) 燈
[事情準備]
安裝 Mosquitto 及設定
安裝 OpenHAB 及設定
安裝 OpenHAB、OpenHAB 2 for MQTT 擴充功能
安裝 OpenHAB for MQTT 擴充功能,首先安裝 binding,可以透過下表指令列出套件名稱
apt-cache search mqtt
安裝 openhab-addon-binding-mqtt
[OpenHAB]
sudo apt-get install openhab-addon-binding-mqtt
[OpenHAB2]
透過 Web UI 安裝 binding-mqtt1 - 1.9.0
[設定 OpenHAB、OpenHAB 2 MQTT]
配置 openHAB 使用 MQTT 服務
[OpenHAB]
sudo nano /etc/openhab/configurations/openhab.cfg
修改成以下內容
============
#######################################################################################
##### Transport configurations #####
#######################################################################################
################################# MQTT Transport ######################################
#
# Define your MQTT broker connections here for use in the MQTT Binding or MQTT
# Persistence bundles. Replace <broker> with a id you choose.
#
mqtt:mybroker.url=tcp://127.0.0.1:1883
#mqtt:mybroker.clientId=openhab
mqtt:mybroker.clientId=pi
mqtt:mybroker.retain=true
mqtt:mybroker.async=false
存檔並重新啟動
連結成功
=======
2018-05-08 13:09:59.707 [INFO ] [o.o.i.s.i.DiscoveryServiceImpl] - Service Discovery initialization completed.
2018-05-08 13:09:59.736 [INFO ] [.io.transport.mqtt.MqttService] - MQTT Service initialization completed.
2018-05-08 13:09:59.741 [INFO ] [o.i.t.m.i.MqttBrokerConnection] - Starting MQTT broker connection 'mybroker'
[OpenHAB 2]
nano /opt/openhab2/conf/services/mqtt.cfg
修改成以下內容
============
mqtt:mybroker.url=tcp://127.0.0.1:1883
#mqtt:mybroker.clientId=openhab
mqtt:mybroker.clientId=pi
mqtt:mybroker.retain=true
mqtt:mybroker.async=false
存檔並重新啟動 OpenHAB 2
連結成功
=======
2018-05-14 14:16:16.353 [INFO ] [penhab.io.transport.mqtt.MqttService] - MQTT Service initialization completed.
2018-05-14 14:16:16.356 [INFO ] [t.mqtt.internal.MqttBrokerConnection] - Starting MQTT broker connection 'mybroker'
重新啟動服務,整體服務啟動時間約 2分鐘
[OpenHAB]
sudo systemctl restart openhab
設定值若有修改過,則須先載入設定值
----------------------------
sudo systemctl daemon-reload
[OpenHAB 2]
sudo systemctl restart openhab2
編輯 OpenHAB items 組態
[OpenHAB]
sudo nano /etc/openhab/configurations/items/door.items
[OpenHAB 2]
sudo nano /opt/openhab2/conf/items/door.items
內容如下
======
正式內容:
Switch bedroom "主臥室門控制開關#1 [%s]" <garagedoor> {mqtt=">[mybroker:sensors/linkit7697/myhome/bedroom/door1/switch:command:ON:1],>[mybroker:sensors/linkit7697/myhome/bedroom/door1/switch:command:OFF:0],<[mybroker:sensors/linkit7697/myhome/bedroom/door1/status:state:ON:1],<[mybroker:sensors/linkit7697/myhome/bedroom/door1/status:state:OFF:0]"}
測試內容:
Switch MQTT_Test "Testing..." {mqtt=">[mybroker:testing/mqtt/topic:command:ON:1],>[mybroker:testing/mqtt/topic:command:*:Switch ${itemName} was turned ${command}]"}
可透過訂閱主題查看測試訊息
mosquitto_sub -h yourmqttbrokerip -t testing/mqtt/topic
訊息如下:
Switch MQTT_Test was turned ON
Switch MQTT_Test was turned OFF
編輯 OpenHAB sitemap 組態
[OpenHAB]
sudo nano /etc/openhab/configurations/sitemaps/default.sitemap
[OpenHAB 2]
sudo nano /opt/openhab2/conf/sitemaps/default.sitemap
內容如下
------
sitemap default label="智慧門鎖控制系統" {
Frame label="Linkit-7697 門#1" {
Switch item=bedroom icon="garagedoor"
}
}
正常編輯 items 及 sitemap 不需重啟會立即更新,不過偶爾會遇到更新無效,這時候可以重新啟動服務試試,整體服務啟動時間約 2分鐘
重新啟動服務,整體服務啟動時間約 2分鐘
[OpenHAB]
sudo systemctl restart openhab
[OpenHAB 2]
sudo systemctl restart openhab2
設定值若有修改過,則須先載入設定值
============================
sudo systemctl daemon-reload
查看日誌
[OpenHAB]
tail /var/log/openhab/openhab.log
[OpenHAB 2]
tail /opt/openhab2/userdata/logs/openhab.log
[控制]
登入樹莓派
ssh pi@192.168.100.210
訂閱(Subscriber):門禁即時狀態
mosquitto_sub -h 192.168.100.210 -t sensors/linkit7697/myhome/bedroom/door1/status
發佈(Publish):控制門禁開關
開門
mosquitto_pub -h 192.168.100.254 -t sensors/linkit7697/myhome/bedroom/door1/switch -m "1"
關門
mosquitto_pub -h 192.168.100.254 -t sensors/linkit7697/myhome/bedroom/door1/switch -m "0"
door.ino
/*
This example configures LinkIt 7697 to send iBeacon-compatbile advertisement data.
You should be able to search this device with iOS or Android iBeacon tools.
created Mar 2017
*/
#include <LBLE.h>
#include <LBLEPeriphral.h>
void setup() {
//Initialize serial and wait for port to open:
Serial.begin(9600);
// Initialize BLE subsystem
Serial.println("BLE begin");
LBLE.begin();
while (!LBLE.ready()) {
delay(100);
}
Serial.println("BLE ready");
// configure our advertisement data as iBeacon.
LBLEAdvertisementData beaconData;
LBLEAdvertisementData beaconEddystoneURL;
// This is a common AirLocate example UUID.
LBLEUuid uuid("E2C56DB5-DFFB-48D2-B060-D0F5A71096E0");
beaconData.configAsIBeacon(uuid, 01, 02, -67);
Serial.print("Start advertising iBeacon with uuid=");
Serial.println(uuid);
// start advertising it
LBLEPeripheral.advertise(beaconData);
}
void loop() {
// The underlying framework will advertise periodically.
// we simply wait here.
//
// You can use iBeacon apps such as
// "Locate Beacon" by Radius Networks on iOS devices
// to locate this beacon.
//delay(500);
}
bl_key.ino
/*
This example configures LinkIt 7697 to send iBeacon-compatbile advertisement data.
You should be able to search this device with iOS or Android iBeacon tools.
created Mar 2017
*/
#include <LBLE.h>
#include <LBLEPeriphral.h>
void setup() {
//Initialize serial and wait for port to open:
Serial.begin(9600);
// Initialize BLE subsystem
Serial.println("BLE begin");
LBLE.begin();
while (!LBLE.ready()) {
delay(100);
}
Serial.println("BLE ready");
// configure our advertisement data as iBeacon.
LBLEAdvertisementData beaconData;
LBLEAdvertisementData beaconEddystoneURL;
// This is a common AirLocate example UUID.
LBLEUuid uuid("E2C56DB5-DFFB-48D2-B060-D0F5A71096E0");
beaconData.configAsIBeacon(uuid, 01, 02, -67);
Serial.print("Start advertising iBeacon with uuid=");
Serial.println(uuid);
// start advertising it
LBLEPeripheral.advertise(beaconData);
}
void loop() {
// The underlying framework will advertise periodically.
// we simply wait here.
//
// You can use iBeacon apps such as
// "Locate Beacon" by Radius Networks on iOS devices
// to locate this beacon.
//delay(500);
}
[參考]


留言
張貼留言